
My dream is to do a full remodel on my master bathroom. But, for now, the $$$ just isn’t there. Instead, I recently made 7 changes that made a huge impact on my builder-grade master bath.
If you want to feel like you remodeled your bathroom, consider some or all of these 7 updates:
1. Fresh Wall & Ceiling Paint:
I’m a firm believer that a fresh paint color can completely transform a room. So, when I had a spare day recently, I painted over the hideous green paint with a nice warm neutral color and I just love the results.

![]() When painting a room, paint the ceiling too. The trick is to paint the ceiling a shade or two lighter than the walls so it doesn’t make the room feel smaller.
When painting a room, paint the ceiling too. The trick is to paint the ceiling a shade or two lighter than the walls so it doesn’t make the room feel smaller.
![]() Another room changer that most people don’t think of is to touch up the paint on the baseboards and door jambs. I gave those a fresh coat of paint as well.
Another room changer that most people don’t think of is to touch up the paint on the baseboards and door jambs. I gave those a fresh coat of paint as well.
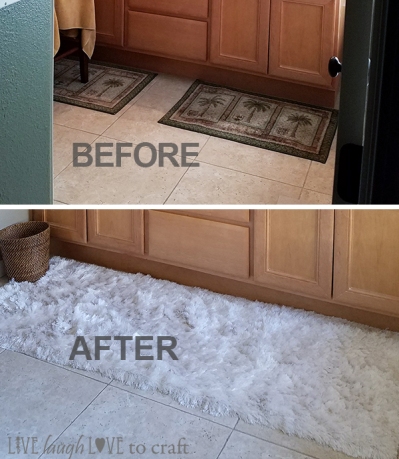
2. Add a Runner Rug:
For years, I had a mini rug under each sink. Then, a neighbor’s house went on the market and when I went to their Open House as a nosy neighbor (tell me I’m not the only one who does this!), I saw they had 1 larger runner rug that spanned the entire vanity and it looked a-maz-ing. So, I got this rug on Overstock and it’s a million times better than before.
Both the lighter color and fun texture really brighten up the room and make it feel fresher.

3. Hang a Framed Mirror:
I’ve been reading blogs about how to frame an existing wall mirror. But, then I discovered Kirkland’s and realized I could get a giant new mirror for ch-ch-cheap. (Bonus: they have an app with coupons).
I had to drive an hour to get to a Kirklands, but it was worth it to get this elegant new vanity mirror.
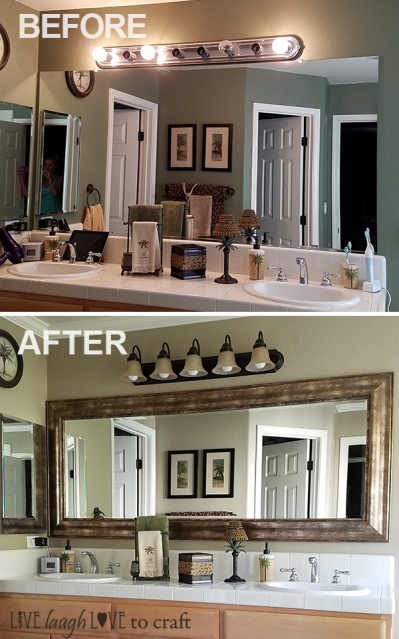

4. Replace an Old Light Fixture:
One thing I’ve always hated was the light fixture, but I wasn’t sure how to swap it out since it required wiring.
But seriously – look at that old one! It was so overpowering I only kept 4 bulbs in at a time. Talk about an eye sore!
I didn’t want to spend a lot of money on this, so I selected this inexpensive fixture from Home Depot. Turns out, it comes with wiring instructions and updating the fixture wasn’t that difficult after all.

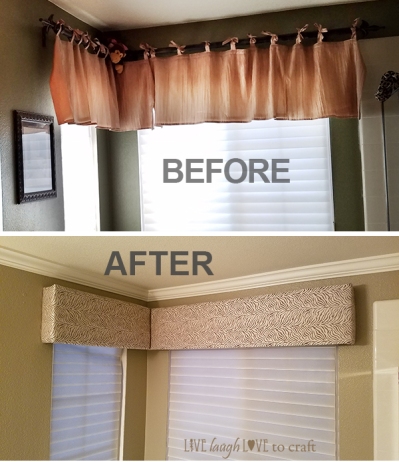
5. Add/Update Window Treatments:
These curtains were here when we moved in. They look so dated!
I made new window treatment from foam board wrapped in fabric. The foam board was only $8 and the fabric was curtain panels I got on clearance at Hobby Lobby.
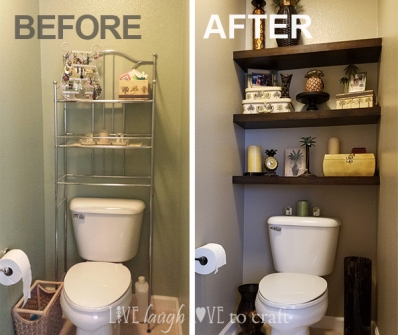
6. Build Wall-to-Wall Floating Shelves:
One of the best updates by far was throwing out this old over-the-toilet space saver and adding built-in floating shelves. I’m still working on styling them do don’t judge that part 🙂

7. Add Crown Molding:
Finally, we put up crown moulding. This was the 3rd area of our home DIY’d some crown moulding. It’s hands-down one of the most dramatic changes you can make to a room.


Someday, I’ll refinish the cabinets and put in new tile and flooring. But, until then, these 7 simple updates have transformed the feeling of my master bathroom.
Have any other simple upgrade tips to share? I’d love to hear them and see what you’ve done to quickly and easily transform your space!
