Yarn Nail Art Pallet Sign Arrow

My husband and I throw an annual party called the Jean Short Jamboree.

Basically, we have all our friends over and require that they wear jean shorts. We encourage silly outfits and give out a prize for our best dressed party goer.

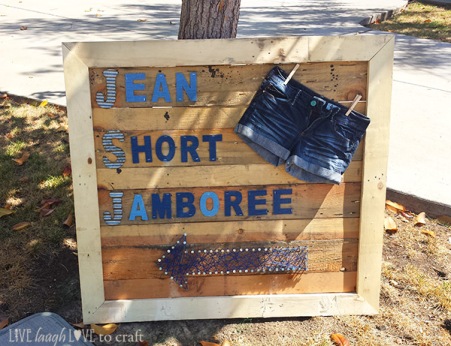
We created a giant pallet sign that we set out front:

blog-pallet-sign-letters-yarn-art-arrow.jpg

Making a pallet sign is so simple. The toughest part is ripping the pallet apart and removing any pesky nails sticking out of the pieces.

blog-pallet-sign-dismantle

My husband uses a saw to cut through the nails, which makes the process go a lot faster.

Next, just lay out the pieces the way you want, piece together a frame, then nail it all together.

blog-pallet-sign-layout-out-nail-together.jpg

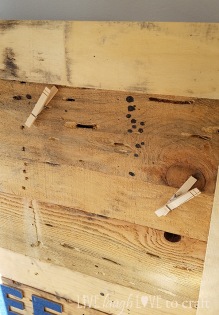
Our sign says “Jean Short Jamboree” with a combination of metal and denim letters that I found a Michaels. I also attached some clothespins so we can hang a pair of denim shorts on the sign.

blog-pallet-sign-clothespins.jpg

Everyone’s favorite part of the sign is the string and nail arrow pointing the way to the party.

Here’s how to add a yarn nail arrow to a pallet sign:

Before you get started – be sure to use nails with large nail heads so your yarn (or string) doesn’t slip off.

blog-pallet-sign-large-nails-heads-string-art-arrow

Print or draw an arrow (or another shape) on paper to be your guide. I had to patch a few pieces of paper together to get the size I wanted.

blog-pallet-sign-nail-arrow


Tape your paper arrow guide to the wooden sign.


Add nails about an inch apart all along the lines on the paper.


Remove the paper (just rip if off).


blog-pallet-sign-how-to-string-yarn-arrow


Next, string your yarn around the perimeter to create an outline.


Be sure to pull the string super tight between the top of each nail.


After that, start stringing your yarn all across and wrapping around random nails until you get the look you want.

blog-pallet-sign-yarn-arrow

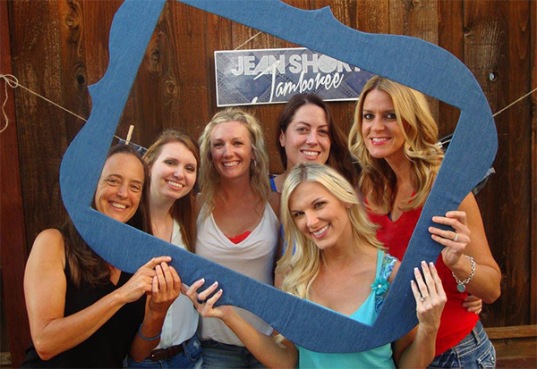
Another fun party accessory I made is this foam board photo prop frame.

blog-jsj-frame-girls


DIY Glinda Crown – Wizard of Oz

My best friend’s favorite movie of all time is Wizard of Oz.

Which is why it’s pretty unbelievable that it took us 19 years to do a Wizard of Oz Halloween costume theme.

But, it finally came to fruition.

She was Dorothy, her husband the Scarecrow, my husband was the Lion and I was Glinda the Good Witch.

We were even finalists in a Halloween Costume Contest!
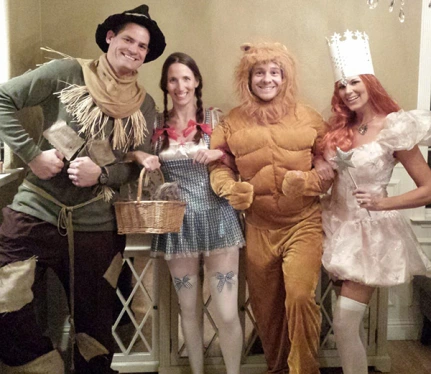
blog-wizard-of-oz-costumes-halloween-group.jpg

(If you’ve poked around my blog, you may recognize my husband’s bulked up lion costume from the year before when we dressed up in a circus theme with our dog.)

How amazing is this crown?
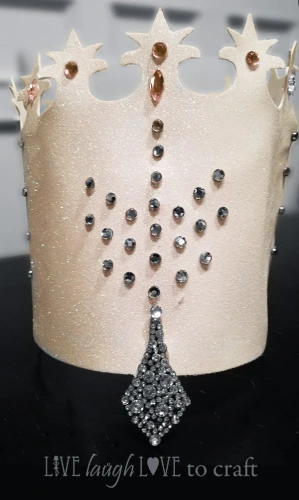
blog-diy-glinda-crown

And guess what, I made it myself!

It’s funny because my husband tends to refuse to wear store-bought costumes because they don’t look authentic. This leads to day-of frantic searches in which Tad enlists my help – even though I’ve pestered him for weeks that Halloween is approaching. *Sigh*

(Not this year though!)

I love store-bought costumes, and I got this Glinda costume from HalloweenCostumes.com. Oh my goodness it was super huge on me (better than too tight!).

I ended up taking it in, but the crown itself was so flimsy and warped I couldn’t use it. Total garbage.

So, I decided to create my own and made it fabulous.

I headed off to Hobby Lobby and found the perfect materials to make my own Glinda the Good Witch crown.

Whether you need a good witch costume for a Halloween party or costume contest or for a character in a Wizard of Oz play…

Here’s How to Make Your DIY Adjustable Glinda the Good Witch Crown:

Materials (the findings/embellishments can vary – this is just the unique way I put mine together – be creative with yours!):

  • 2 Sheets of Glitter Foam Paper – like this
  • Rhinstone/crystal embellishments with flat backs
  • Front jewel
  • Blank Ear Studs – like these
  • Hot Glue
  • Velcro

I got all my supplies at Hobby Lobby, but they don’t sponsor me in any way and I’m sure you can find similar items at any craft store.

Steps:

Create Your Crown Shape & Cut Out Crown:

Draw out your crown shape to trace on the back of the glitter foam paper if you don’t have a Cricut.

Here is the file I created to cut out the crown shape on my Circut:
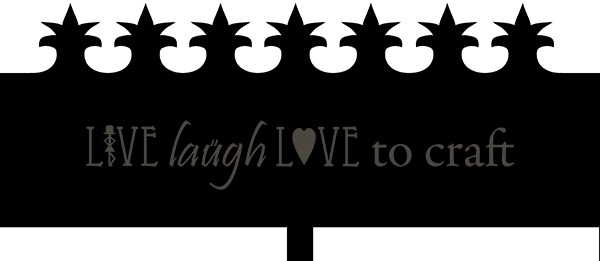
blog-glinda-crown-graphic-shape

Unfortunately, it didn’t cut the foam paper as well as I’d like, so I had to go back over the semi cut-out crown and finish cutting it with scissors. (I’ve since upgraded to a new Cricut).

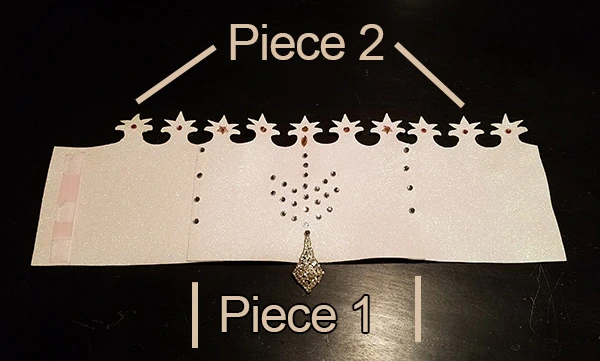
Since 1 piece of foam (11″) wouldn’t reach all the way around my head, I had to use 2 pieces of foam. So I divided the graphic between the front and back sides.

Attach The Front & Back Pieces:

I wanted the crown to be flexible, so I could tighten it to fit my head exactly.

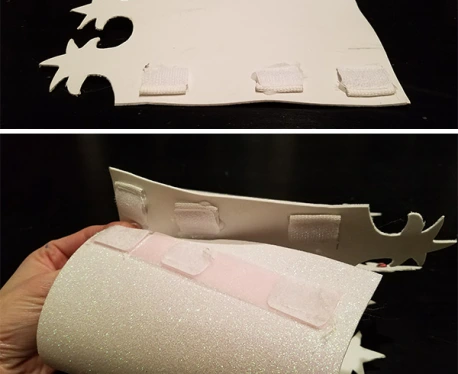
So, Piece 1 used for the front section, and Piece 2 I cut in half to attach to each side of the front, then velcro together in the back:
blog-diy-good-witch-crown-parts.jpg

I used hot glue to adhere them together, then used 4 of the plain earring studs to reinforce each of the seems.

Embellish Your Crown:

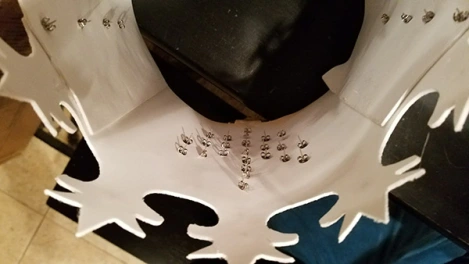
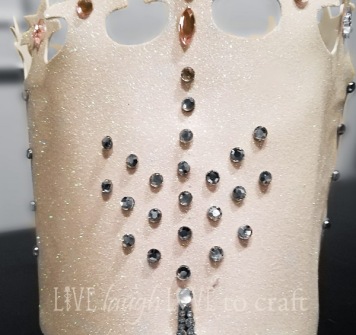
I wasn’t sure the rhinestones would stick well when glued to the glitter foam paper, so I did the same thing to embellish the front as I did to reinforce the seems in the last step.

I pushed the plain earring studs through the foam in the shape of the design I wanted for the front. This method worked great because it was easy to reposition any suds that I didn’t initially place well.

Note: I placed all the earring studs high enough that they wouldn’t poke into my forehead or anywhere else!

Then, I hot glued the rhinestones to the flat fronts of the plain earring studs.

blog-diy-rhinstone-crown-for-good-witch-costume.jpg

blog-glinda-crown-with-studs-inside

Here was the outcome of the front rhinestones:
blog-adjustable-glinda-the-good-witch-crown-rhinestone-design.jpg

Add Additional Embellishments:

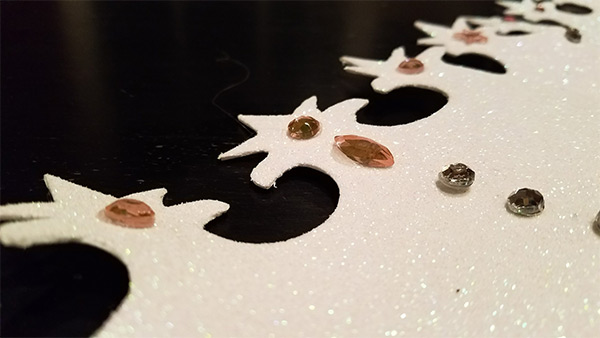
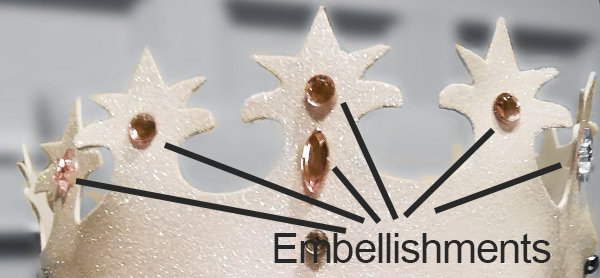
I glued additional embellishments to each of the top spokes of the crown:
blog-top-crown-embellishments

blog-glinda-crown-pink-rhinestone-embellishments.jpg

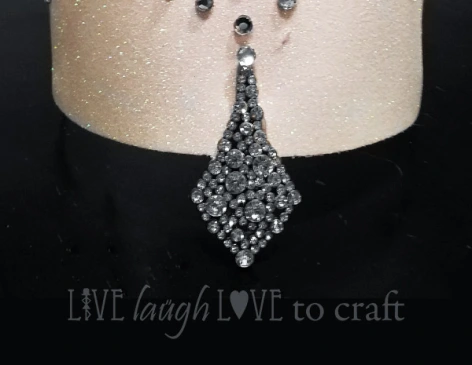
As well as the signature piece to the front that hangs down on the forehead:
blog-wizard-of-oz-crown-jewel.jpg

Attach Velcro to Make Crown Adjustable:

To make the crown adjustable in size I chose to add velcro to the back.
blog-adjustable-good-witch-crown-with-velcro.jpg

Here were are all decked out on Halloween:

blog-wizard-of-oz-good-witch-crown-diy-costume-accessory

Simple Wainscot Wall with Big Impact

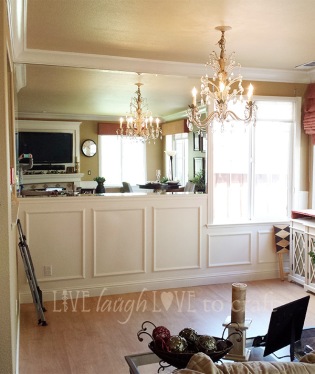
This is the accent wall with wainscoting and a custom fitted mirror that we added to “class up” our tiny formal dining area and make the small space feel bigger:

blog-formal-dining-room-accent-wall-wainscoting-mirror.jpg

My husband loves to play ping-pong. So what better gift idea (or so I thought) for Christmas morning than a ping pong table we can set up in the garage, have friends over, and play?

I even found one that was black and red to match our garage’s color scheme.

All was well until my husband decided we should keep the ping pong table inside the house….In the formal dining room. Where there wasn’t room to leave it set up, but instead folded up and pushed against the wall.

I don’t know how this situation got away from me, but I spent a full year looking at this eye sore in my living room. After about 6 months I threw a gold fitted sheet over it and tried to pretend it wasn’t there.

I SO wish I had a picture to show you. But, I hated it so much I didn’t even stop to take a picture when my husband finally agreed to move it back out to the garage – I didn’t want any hesitations or delays causing him to change his mind!

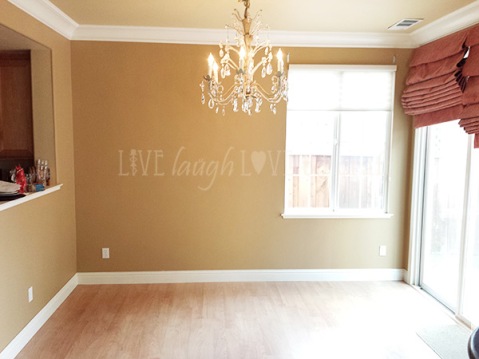
So, once we removed the ping pong table (but before we moved the cornhole set – another gift idea gone wrong) here is what the room looked like (just imagine a gigantic ping pong table filling up the wall space on the left):

blog-wainscot-wall-dining-room-before

Even without the ping pong table, things look pretty drab. We had a rickety cabinet against the wall (that my husband scored for free when he lived as a bachelor in San Francisco and we’ve since painted twice) and a bar table from my college days. (Yes, we have both brought some bad decor into this home – keep in mind it’s our first!)

Now that the massive table tennis table was gone, here was the plan:

You can read about the bar table makeover here. Pretty dramatic, huh?

Once we cleared out the room, here was our wall:
blog-wainscot-accent-wall-before

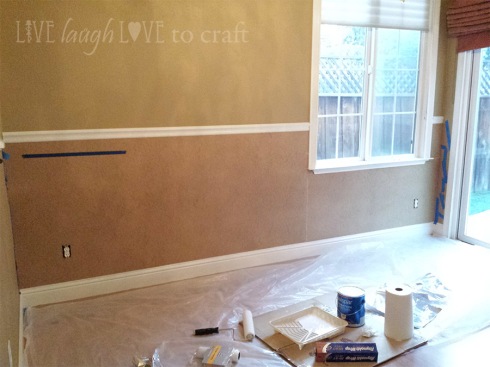
We framed out the window, added some hardboard along the lower portion of the wall, and ran some decorative chair rail along the top of the board.

(We just rested the hardboard on top of the baseboard, but in future projects we decided removing the baseboard and putting it on top of the hardboard looks much nicer.)

blog-wainscot-wall-building

The trickiest part was cutting out the holes in the exact right spots for the outlets. (By the way, if you ever cut a hole too big, you can cover your mistake with oversized switch plates).

blog-wainscot-wall-hardboard-outlet-opening.jpg

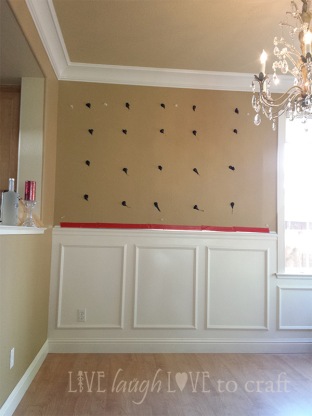
Next, we nailed the boxed frames to the hardboard (which we created in custom sizes to fit our wall), caulked all the edges and nail holes (ugh, tedious!), and painted everything white.

blog-wainscott-wall-with-fashionwall-hardboard-wall-panel

We just love how it came out!

blog-wainscot-wall-accent-boxes-frames.jpg

Next, we had a local glass and mirror company create a custom mirror to fit the remaining space. Can you believe they mount it without smearing the glue? They just add all these dollops and somehow it holds.

blog-wainscot-mirror-wall-installation.jpg

blog-wainscot-mirror-wall-formal-living-room-complete.jpg

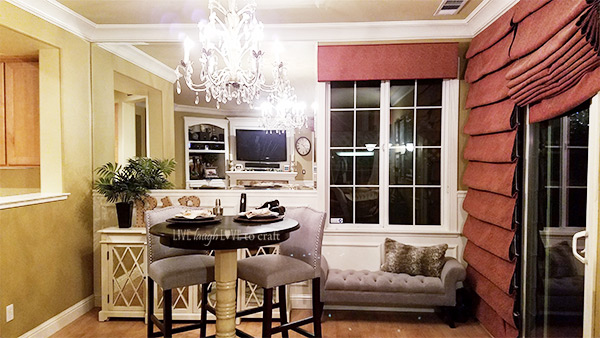
Here it is with the new Ballard Designs sideboard cabinet, updated bar table and cute gray tufted accent chair under the window (which I hadn’t planned but couldn’t pass up when I found it at Home Goods – I promise the animal print pillow on top matches far better than it appears to in this picture):

blog-wainscot-mirror-accent-wall-formal-dining-room-reveal.jpg

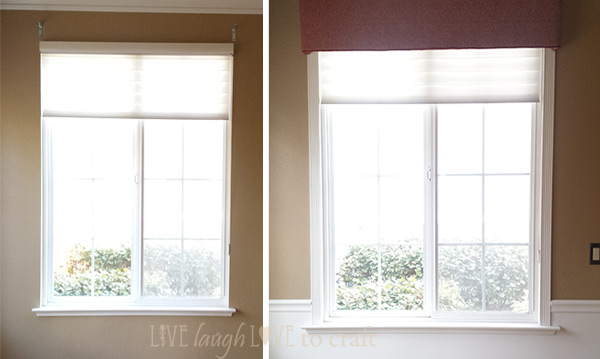
The only thing left in this room is to get new window coverings (yes, I know they’re hideous at this time) – stay tuned!

In the mirror, you can see the reflection of our TV wall makeover.

Funny thing about the bar stools – I bought one at a Target that’s not closest to my home because I happened to be in that town one day. After bringing it home I liked it and ran to my local Target to get another. However, one has darker legs than he other and is super, super firm while the other is nice and cushy. So odd!

blog-wainscot-wall-mirror-wall-before-after

It looks a little busy in the picture, but the large mirror wall makes the room feel sooo much bigger! I have to admit it cost more than I wanted, but I just love it. So much so that I’d like to add another one above the board and batten in our kitchen.

Have you ever used mirrors to make a space feel bigger? I’d love to see it!

Sparkle Football Tee for Game Day – Simple Iron-On

So, football really isn’t my thing.

In general, sports really aren’t my thing. Shhh! Don’t tell my husband!

But, for the rest of America, the Super Bowl is a pretty big deal. So, every year, I attend a Super Bowl party and pretend to enjoy myself while mingling, eating too much and huddling around a giant TV screen.

This year, I figured I might as well look cute while I did all of the above.

So, yesterday I picked up this cute top at Target:

blog-football-tee-gray-target-shirt.jpg

I actually had a really fun graphic designed that said “Today’s forecast: Drinking with a Chance of Football.”

blog-tee-forecase-drinking-chance-of-football.jpg

But, I forgot to see how much iron-on material I had before I left the house. Whoops!

Things got really simplified and I decided to just do a giant gold sparkly football on the front:

blog-football-tee-iron-on-gold-sparkle.jpg

Can’t wait to wear it this afternoon! I’ll post pics later! Happy Game Day everyone!

blog-football-tee-for-game-day-iron-on-sparkles.jpg

UPDATE:

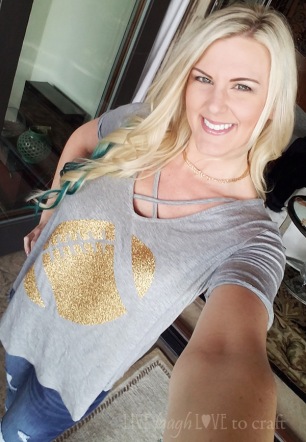
Here I am sporting my tee at my parent’s party:

blog-football-tee-gold-sparkle-iron-on-mom

Sadly I got more compliments on my teal ombre Bellami hair extensions, haha. But that’s OK. All in all a good day.

Built-In TV Frame Above Fireplace

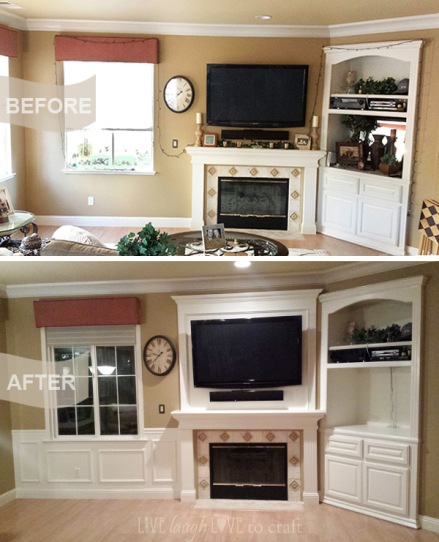
For a long time the built-in cabinet on the right side of our TV wall overpowered the rest of the wall space. It’s not centered on the wall and it’s smushed right up against the fireplace mantle:

blog-tv-mantle-frame-before.jpg

And as much as an eye sore it is during the daylight hours, I have a thing for dim lighting at night, hence the strung Christmas lights that hung in here year-round.

We finally did something about it. We framed out the TV space above the mantle and added wainscoting under the window:

blog-tv-mantle-frame-wainscot-wall-built-in

Much more balanced!

Here’s some details to our living room wall upgrade:

Framed Out Window

We added a frame to the left and right edges of the window. This required replacing the window ledge to make it wider. (Super, super easy!)

blog-tv-mantle-frame-window-2.jpg

Wainscot Accent Wall

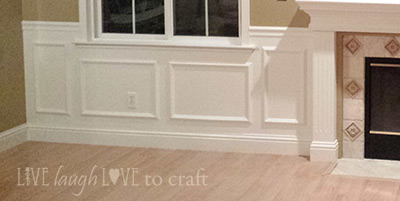
We added wainscoting under the window to match the wainscot wall on the opposite side of the room.

blog-tv-mantle-wall-wainscot-frame-panels

Built-In TV Frame

Finally, we created a frame for the television with crown moulding on the top. Sooo much went wrong with this portion of the project. But in the end, it came out great!

blog-tv-mantle-frame-with-crown-moulding.jpg

Here’s the before and after one more time:

blog-tv-mantle-frame-wainscot-wall-before-after.jpg

Keep in mind, that red window cornice is going. It’s on my long list of projects that will be perfect for the next weekend day we have without rain!

And, I’m still re-styling the clutter that was filling the right section that was already built-in and used by the previous homeowners to store their TV.

Recommendations appreciated! How should I fill the large empty built-in TV nook on the right?!?